A Major Acheesement

Macaroni and Cheese is my favorite food… in theory. Pasta? Check. Cheese? Double check. But Macaroni and Cheese (capitalized because this blog is my world and there could be no more proper noun than the food I love most) is a ticking time bomb. Your great-aunt-whatsherface brings it to every get together, and you always dive in, hoping for melty, gooey glory… but what you get is a block of solidified béchamel or grainy slivers of weird where sauce used to live.

I have tried for YEARS to make the perfect roux, the perfect  béchamel , the perfect base to allow REAL cheese (read: NOT VELVEETA) to shine its countenance upon the buffet tables of my life. I want it to be every bit as good at the age of one hour as it is fresh off the stovetop or piping hot from the oven. I want it to be creamy and delicious, with a perfectly cooked pasta delivery device to ferry this cheesy perfection of my dreams into my mouth. But that is not the way of Macaroni and Cheese.

Translation: I have failed. Often, and repeatedly. With good cheese, with bad cheese, and even with… Velveeta (don’t you judge me- desperate times call for desperate measures). It’s always the same story- overly squishy pasta once it gets to your family reunion; a block of béchamel – a béchablock, if you will; and cheese that used to be magnificent but has now been reduced to an oily, grainy mess with an awkward skin on top.

But then… I opened a bakery, and science, the backbone of pastry, won. Somehow, I’ve been so stupid for all of these years, with the answer buried beneath layers of pastry cream and citrus fruit applications.

We can fix this, you guys. And it’s as simple as salt.

Sodium Citrate is a type of salt. It’s the sodium salt of citric acid– to explain it most simply, that’s the stuff in lemons and limes that makes them sour. Sodium Citrate is already in your diet, I would guess, daily. It’s in club soda, most processed meats like bratwurst, Kool-aid, Jello, candy, yogurt, soda, and wine, just to cover some basic bases.

Now. Where do you get it? Here, through this handy-dandy Amazon link, for starters: Sodium Citrate. You can also find it anywhere ingredients for molecular gastronomy are sold- that’s the science-y division of cheffing. You will also be pleased to know that this doesn’t cost an arm and a leg- if you have Amazon Prime, you’re looking at $6 for PLENTY for a dozen batches of cheese sauce.

Sodium Citrate will allow us, with just a few ingredients, to make silky, smooth, creamy, and glorious cheese sauces that manage to hold that way- not only for Macaroni and Cheese, as we will do today, but also nacho cheese, beer cheese, fondue, and topping for vegetables. Order it now, you’ll have it in a day or two, and then you can message me your thanks from your cheese coma.

The Last Macaroni and Cheese Recipe You’ll Ever Need

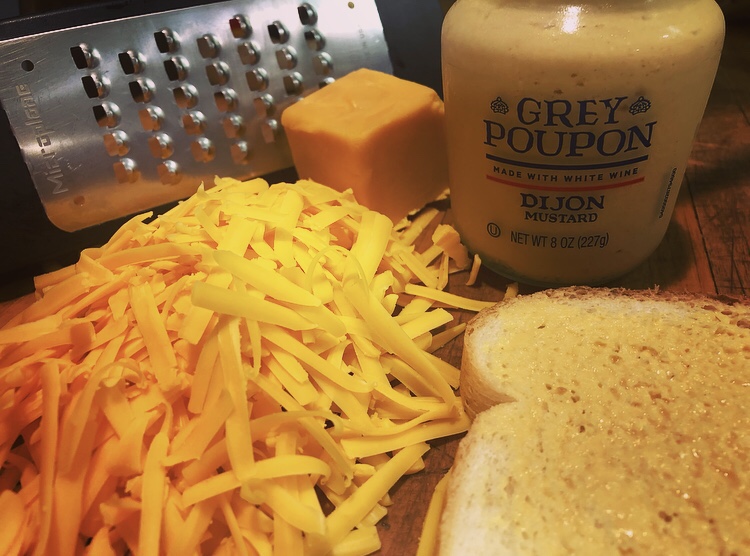
  • 12 ounces by weight of grated cheese (I used sharp cheddar- it is very important that you GRATE THIS YOURSELF, no matter what variety you use- we don’t need to add cellulose from pre-shredded cheese to this party. This Microplane will make it easier- you’ll note that this is not the first time I have recommended this Microplane … it’s because you will use it nonstop)
  • 1 cup whole milk
  • 2 teaspoons Sodium Citrate (use a metal measuring spoon, not plastic or ceramic, for accuracy)
  • 1 pound of cellentani or cavatappi pasta (you can use less if you want a higher sauce-to-pasta ratio, but don’t go below 3/4 pound)

Boil your water for your pasta, but do not salt it. This is likely the only time you will ever hear me say this- but the cheese sauce in this recipe has enough salt in it between the cheese and the sodium citrate, which, you will recall, is a type of salt. Once your water is boiling, add your pasta and PAY ATTENTION. You want your pasta al dente– so just under what you probably consider “done”. Remember, it’s about to spend some time sitting in cheesy liquid, too.

Meanwhile, bring your 1 cup of whole milk as well as your 2 teaspoons sodium citrate to a simmer. Not a boil. A simmer.

Sodium Citrate, a salt that will change this milk into magic.

Once it simmers, you can begin whisking in small handfuls of your grated cheese. The idea is to gently add it, without overwhelming the milk. So add a small amount, whisk until smooth, and add some more. Keep going until it’s all in. Then immediately remove it from the heat. It is at this point that you can add some other seasonings to your cheese mixture, based on your personal preferences. I added some ground mustard, maybe 1/2 teaspoon, to mine. You might like paprika, chili powder, onion powder, jalapeños, bacon, ground beef, broccoli… or you might just want to leave it as cheesy as possible. I’m not here to judge.

Patience, grasshopper.

Once your pasta is done, drain it well and then add it back to the pan. Pour your cheese sauce over the top and stir.

Oh. Em. Cheese.

It’s ready to eat now…

Or you can optionally put it in some greased ramekins or a baking dish, and sprinkle some panko bread crumbs on it, and toss it under the broiler for a few for a crunchy delight on top of this creamy masterpiece.

I’ve had it both ways, and can’t say I was disappointed in either.

As it cools, it will certainly become thicker… but it will not turn into a weird block, nor will it be grainy and off-putting… and YOU will be the star of your next pitch-in.

As always, let me know how you like it, and don’t forget to subscribe to the blog by clicking the FOLLOW link. And feel free to share this post with your friends!

What’s the Big Dill?

Summer is notorious for cookouts, family gatherings, and pool parties chock full of delicious food. Inevitably, someone is relegated to bringing a token vegetable tray in a half-hearted attempt to make everyone at the party feel better about their impending gluttony. I must admit that I love a crudité… but I am always, ALWAYS disappointed to see the Demon Ranch. There is a time and a place for ranch. It’s fine. But that time and place are not EVERY SINGLE TIME A RAW VEGETABLE IS PRESENT.

Parents of toddlers (and those with a toddler palate), take heart: Dill Dip is here to save the day.

Dill Dip was introduced to me by my sister-in-law and friend, Andrea, this summer, at just such a pool party, located at my own house. All summer long, our house is open on Sundays, and friends and family are welcome to come, and bring a dish to share. She modestly opened a container, saying that her mother had made this dip… and my whole life was suddenly different.

It is creamy, it has texture (but not the gross kind), it is speckled with herbs and spices, and it fills in all the gaps that garlic-forward Ranch left behind. I spent the remainder of the summer trying a few recipes I found online, and then finally wrote my own, as is my way. I am pleased to share it with you here.

A quick note: I make my own seasoned salt, and I have a recipe for both regular, and salt-free. There is some cardiac trouble among the members of both sides of my family (and we could all use a little less salt, honestly). I maintain that the salt-free version is JUST as good. I’ll start with these recipes… but you can always use the store-bought stuff in the shiny can… it’s just mostly salt, with less of the other seasonings, so I prefer my own. Look at this– you’re getting three recipes for one today!

Seasoned Salt

Homemade tastes better, I promise! And it’s easy!

Mix these together:

  • 1/4 c kosher salt (I prefer coarse ground)
  • 4 t ground black pepper
  • 1 t paprika (I use regular, but if you grill a lot, maybe try smoked!)
  • 1 t garlic powder
  • 1/2 t onion powder
  • optional, if you like spice: 1/2 t ancho chile powder

Salt-Free Seasoned Salt

Mix these together:

  • 1 t chili powder (not ancho- just regular)
  • 1/4 t celery seed (NOT CELERY SALT)
  • 1 t onion powder (NOT ONION SALT)
  • 1 t paprika
  • 1/2 t garlic powder (NOT GARLIC SALT)
  • 1 t turmeric
  • 1/2 t paprika (again, smoked if you like to grill)
  • optional, if you like spice: 1/2 t ancho chili powder

Dill Dip

This is it! What could be easier??

Mix these things together, and let them chill in the fridge for a couple of hours or overnight before serving, to allow the flavors to blend!

  • 1 1/2 cups sour cream (Greek yogurt also works)
  • 1/2 cup mayo
  • 1 T dried parsley
  • 2 T dried minced onion
  • 1 1/2 t seasoned salt, or seasoned salt substitute
  • 2 T dried dill weed
  • optional: a sprig of fresh dill to garnish right before serving

I have friends who have told me to use this on sandwiches, as a spread on cold veggie pizza appetizers, potato salad, add a little horseradish and use on steak, add a little buttermilk and use it on a salad, and of course–PLEASE, use this on your next veggie tray! Let me know how you like it, and don’t forget to SUBSCRIBE to the blog! Just hit the FOLLOW link below- and follow the instructions. Easy peasy!

Hoosier Lasagna is a Thing. Let Me Prove It.

Maybe it’s because I grew up in Indiana, or maybe its because I grew up in the 1980’s… or maybe it’s because I like cheese. But authentic Italian lasagna to me, while unctuous and delicious and full of punchy flavors, is NOT what I’m looking for when I want to taste my childhood. If you grew up in Italy, or with an Italian grandma, you can just let go of all that you know right now. This is another thing.

My thoroughly not-Italian dad made our lasagna. It was creamy, and gooey, and full of distinctly not-Italian cheeses. Also, I would like to point out, my dad used cottage cheese. To this day, I don’t know if it was because ricotta wasn’t available, or because we didn’t have much money, or because ricotta at that time in our small-town grocery store was prohibitively expensive. My updated recipe allows for either option- use whichever you’d like best- or mix them! It’s a mad world out there, people. We might need multiple cheeses to make it through.

Another childhood lasagna that I couldn’t skip would be that of my school system- that’s right– my SCHOOL CAFETERIA LASAGNA was the stuff dreams are made of. My school, in the 1980’s, still made our lunches from scratch. And they were DELICIOUS. To this day, the cinnamon rolls dipped in chili (don’t make that face- we’ll cover that later), the taco bar (giant vats of help-yourself shredded cheese and veggies), and the lasagna are legendary. The school no longer makes their own lunches, due to – believe it or not- the need to count precise carbs for the rising number of diabetic kiddos in our society- but that’s a problem we’ll have to tackle in another post. It’s a sadness, but the current generation of kids at my old school have no idea what they’re missing.

My recipe hits my nostalgia squarely in between my school lasagna and my dad’s… and I can’t wait to share it with you!

First, we have to tackle an important issue:

I

Don’t

Like

Fennel.

I can’t help it. It’s terrible. It’s the Roman Empire of food– it takes over every single thing it touches. It has a slight licoricey flavor- sort of along the lines of anise- and that’s reason number 87 why we won’t be using fennel or any of its friends in our lasagna today. If you want fennel in your lasagna, you need to make traditional Italian lasagna, with Italian sausage, but that’s another post, for another day. Not today, Fennel.

Next up: noodles. I have always, for my entire adult life, used the noodles dry, because there are 1883648 recipes online for no-boil lasagna. Boiling those noodles has always seemed like an extraneous and annoying step which warranted no benefit. Here it is, folks: I was wrong. Boiling your own noodles means you have perfectly cooked noodles, so long as you don’t overcook them. So pay attention to what you’re doing. You know. Use your… noodle. We will lay them out on sheets of parchment so that they’re ready when we need them, with no drama.

Make sure your water is boiling. Add salt for flavor- but not oil.
Pretty ladies all in a row.
Layering edges means there are lots of places for sauce to hide.

Cheese is my favorite thing. I can’t help it. I’ll try pretty much any cheese, and I’ll probably love it. I love cheeses which are delicate to robust, creamy to unyielding, and there’s even a time and place for processed cheese. This lasagna, the nostalgia-ridden lasagna of my rose-colored memories, uses mozzarella and grated parmesan– the kind out of the big green canister. Don’t make that face. Just trust me here. There is logic at work here. I’ll get to it, I promise.

Ricotta, with green-can parmesan, salt, egg, and dried herbs. Everything we need for creamy filling.

In my previous lasagna attempts, I have always bought a jar of my favorite pasta sauce. It was okay. It hit all the things you’re supposed to hit with lasagna… but only vaguely. So in this version, we’re making our own sauce… but don’t fret… this will come together quickly, and in the same pan as the meat. You won’t mess it up, I promise. Don’t be intimidated. You’ll be rewarded with mouthful after mouthful of rich, decadent, perfect meat sauce.

Everyone in the pool, on our way to some truly delicious sauce!

Now- why do I make some of the choices I do? Why canned parmesan and tomatoes? Why dried herbs instead of fresh? Here it is: this dish was born of busy weeknights. It’s made to be able to be thrown together at any time, with ingredients you already have on hand. Meat from the freezer that was taken out to thaw the night before, jarred minced garlic from the fridge, canned tomato products and cheese from the pantry, dried herbs, and even regular old cottage cheese mean you can throw this together in a flash, and you will be met with stuffed-mouth silence at the dinner table.

You guys, it’s time.

Nostalgia Lasagna

  • 1 1/2 pounds ground beef or chuck
  • 1 pound breakfast sausage- hot, medium, or mild, to your taste. I use hot.
  • 2 cloves of garlic, or 2 teaspoons out of a jar of minced garlic
  • 2 cans of whole tomatoes (14.5 ounces each)
  • 2 cans of tomato paste (6 ounces each)
  • 2 T + 2 T dried parsley
  • 2 T dried basil (you can always adjust to your taste, but this is a good starting point)
  • 1 t salt + 1 t salt
  • 2 eggs, slightly beaten
  • 3 cups of cottage cheese OR whole milk ricotta OR a combo if you’re feeling feisty
  • 1/2 c + 1/2 c grated parmesan – the kind in the green can
  • 1 pound sliced mozzarella- the kind you’d use for sandwiches
  • 1 box of lasagna noodles
  1. Boil a very large pot of water on the stove. Salt the water heavily– this is your ONE chance to season this pasta. Do not add oil to your water- the purpose of lasagna is to allow those noodles to soak up some sauce, and if you add on a layer of oil, that won’t happen. Boil your lasagna noodles for slightly less time than the box says you’re supposed to. We’re going to cook them again, remember, and no one wants squishy, waterlogged noodles. When your pasta is finished boiling, lay the noodles out on sheets of parchment or wax paper. This will keep them ready for your use at a later stage.
  2. While you wait for your water to boil, go ahead and mix your meats and the garlic in a bowl with your hands. I use hot breakfast sausage, but you can use whatever heat level you like. Remember, it’s going to be mixed with beef, and we’re relying on the seasoning in the sausage to season ALL of the meat. It results in a rounded, warm flavor throughout. Do NOT use Italian Sausage here. Heat up a skillet and add your meat mixture. Brown, working with a wooden spoon until crumbly and relatively fine. Something I really like to do is to sort of “fry” the meat in the fat at the end– even after it’s browned. This provides a texture which I really like in the finished product- it keeps it from being sort of… mushy. After you’ve browned it, drain off the fat.
  3. To the meat, add the canned tomatoes, the tomato paste, the basil, the first 1 t salt, and the first 2 T of parsley. Stir it occasionally, breaking up the large pieces of tomato as it cooks. Let it go for however long it takes you to put together the rest of the ingredients– just keep stirring it every so often as you go. The longer it goes, the more the ingredients will mingle.
  4. While your sauce is cooking, use a medium bowl to mix together the ricotta or cottage cheese, the eggs, the first 1/2 c grated parmesan, the remaining parsley, and the remaining salt.
  5. Get out your dish, and here’s a secret. You can either use a 9×13 dish, OR you can use TWO 8×8 dishes, based on the size of the crowd you’re feeding. If you do two dishes, you can bake one tonight, and throw the other in the freezer, to thaw and bake off another time. That’s what I usually do.
  6. Cover the bottom of your pan(s) with a layer of lasagna. You’re going to have plenty of noodles, so don’t be afraid to slightly layer the edges or trim a piece to fit every available space in the pan. That’s what I do.
  7. Next, spoon half of the soft cheese mixture over the noodles. Spread this out evenly- everyone wants some in every bite.
  8. Cover your cottage cheese with a layer of mozzarella slices. I prefer slices to shreds, and here’s why. I like perfectly even distribution of cheese, and this makes it super easy. You can even trim pieces to fit extra spaces, just as you did with the lasagna noodles.
  9. Next comes your delicious homemade meat sauce. You’ll want to use just about half of this mixture. Spread it evenly, because even distribution means everyone gets some in every bite.
  10. Repeat the noodle, soft cheese, sliced cheese, and meat sauce layers again. You should have used all of your ingredients by now, except for the remaining 1/2 cup grated parmesan, and maybe some scraps of slices. At this point, go ahead and add any extra slices and sprinkle the parmesan over the top. I have made this both ways- with sliced cheese on top, and with the grated parmesan, and I must admit that it’s easier to serve– but still delicious– with the parmesan only. But you do you. If you’re a Cheesaholic, add some slices. I’m sure you’ve guessed that I add slices. I can’t help myself.
  11. Place in a preheated 350 degree oven for 30 minutes, or until hot and bubbly. If you’re freezing one, wrap it tightly WITHOUT baking, and throw it in the freezer. When you’re ready for it, take it out of the freezer and allow to thaw in the fridge until you’re ready for it– up to two days. Then bake at 350 for 30 minutes, just as above.
I just wish you could smell it.

Don’t forget to SUBSCRIBE, and let me know how you liked it in the comments below!

It’s Just a Cheese Sandwich

You’ve eaten them since you were little. Your kids eat them NONSTOP and you’re reeeeeeally bored with them (and wish these small humans could appreciate your extra sharp cheddar instead of their plastic square cheese). But I promise… this is not THAT Grilled Cheese. Stick with me, kid.

A sneak preview of where we’ll end up.

THIS Grilled Cheese is ooey and gooey and ACTUALLY TASTES LIKE HEAVEN. Seriously. But first, we have to address a few problems.

  1. The Elephant in the Room (its name is American Cheese). American cheese is not really cheese, so should it take center stage? I know, I know. It’s what you (and I) have eaten for our whole entire lives and it makes the grilled cheese you grew up with and it’s creamy and melty and yada yada yada. We can do better. American cheese is Cheddar in sheep’s clothing. It’s wannabe Cheddar. It WISHES it could be Cheddar, but instead, it’s just… the nap of the cheese world.
  2. Cheese and its baggage. Cheddar, Swiss and their other cheesy friends can often get oily when they melt. This is true- but help is on the way!
  3. BREAD (this one is more important than you think). Grilled Cheese on whole-wheat-sticks-and-stones bread, while tasty, does NOT hit that childhood Happy Place you’re looking for in the first place when you eat a Grilled Cheese, and your kids will fight you on it, too, because it doesn’t “look” right. I maintain that sticky-teeth-white-bread is actually the correct bread for this application- but you can’t mistreat it. No shoving it around a poorly heated skillet with a turner that can’t get under it. More on that later. You CAN use “grown-up” white bread here (sourdough, country, etc.), but if you’re going to do that, you’re probably making another kind of sandwich altogether, if we’re honest.
  4. Additives. I say that any additive has to ENHANCE the cheese, not cover it up. Bacon, while delicious and perfectly suited for a Grilled Bacon and Cheese or BLT, is NOT going to end up on this sammich. Sorry, not sorry. Instead, we’re going to use Dijon Mustard (pay attention- this is NOT the same as Spicy Brown or Deli Mustard). Hey- don’t make that face! You won’t be able to pick out the flavor of mustard, and neither will your kids. But the mustard will actually act as an emulsifier to keep your cheese from being oily in the finished product. And, since we’re using a sharp and delicious cheese, the mustard will act to accentuate that sharpness and make you sorry you didn’t do this before.
  5. Fat. It’s what gives us a roasty toasty exterior with potential for maximum crunch. And… This is the last place we will steer off of the well-established Grilled Cheese path. I know your grandma used butter, and your mom used margarine, and your weird neighbor growing up used oil, but go with me here. The subtle flavor of butter, while fine for American cheese, gets lost when posted up against Cheddar. Mayonnaise, specifically Duke’s Mayonnaise (the only brand I can find with no added sugar – seriously, America, do we have to add sugar to EVERYTHING??) will give you a perfect dose of flavor, along with the kind of bite that will have your family calling you a Crunchasaurus in no time. Also, mayo is smooth and won’t tear up your delicate bread the way butter can.
  6. Time. One Grilled Cheese at a time in a pan on a stovetop for a family of six makes my eye twitch. Someone is getting soggy bread that way. Nope. We’re going to do this, all at once, in mere minutes.

Now, let’s get to it. In terms of equipment, you will need (links provided in case you need any of these things, and Amazon is speedy-quick so a quick order and you’re ready for Meatless Monday): an oven, a sheet pan, parchment paper sheets (I prefer sheets to the roll kind because sheets don’t roll up and create a game of tag in your kitchen), a butter knife, a sturdy turner (I like a metal one), a Microplane Grater (yes, they’re really better- no one wants shredded knuckles from your old dull grater, and these give you smooth and easy shredding for decades). These are all things you’ll use ALL THE TIME once you have them. Trust me, they’ll make your life easier, and not just for Grilled Cheese.

Ingredients for four sandwiches:

  • Duke’s Mayonnaise- about 1T per sandwich, so 4T
  • Dijon Mustard- about 1/2 t per sandwich, so 2 t
  • 1 16 oz. block Extra Sharp Cheddar Cheese
  • 8 slices white sandwich bread

Let’s get ready- in a professional kitchen, we call this mise en place– it means “everything in its place”– and it’s the real-deal secret to a successful meal of any kind.

  • First, preheat your oven to 425. Don’t worry- it’s not too hot. It IS important to do this at the beginning, though, if you’d like to be the aforementioned Crunchasaurus.
  • Line your sheet pan with a sheet of parchment paper.
  • Grate enough Extra Sharp Cheddar Cheese so that each sandwich will end up with 1/2 cup, loosely packed. I know that sounds crazy- but it’s Cheddar- no need to be stingy. You do actually want to grate the cheese, rather than using slices. It has to do with the humidity of the cheese, but just trust me. Also, you need to do it yourself- don’t use cheese out of a bag. The stuff in a bag is coated with cellulose, which is actually intended to keep your cheese from sticking together. The concept of a melt is we want everyone in this pool together- so grate it yourself.
  • Stage up your bread on your sheet pan so that you’re sure you have enough. A sheet pan will fit up to eight sandwiches. If you are making one, or three, or five, it doesn’t matter. Still use the sheet pan.
  • Get out your Duke’s Mayonnaise and your Dijon Mustard, and your butter knife while you’re at it.

Sammich Prep:

  • Spread a very thin layer of Dijon Mustard on the “inside” of each slice of bread. That means this sammich will have mustard above and below the cheese. Remember- this will help your cheese be creamy and magical.
  • Pile about 1/2 cup cheese on top of the mustard on the “bottom” bread slices. Top with the other slice, mustard-side down.
This sandwich is truly outrageous.

  • Spread the outside of the sandwiches (where your grandma used to put the butter) with Duke’s Mayonnaise. Don’t be shy, but don’t slather it. You want a nice, even layer, all the way out to the edges. #Crunchasaurus
  • Line up your sandwiches in your pan as you make them, and place them into your fully-heated 425 degree oven. Set your timer for 7 minutes and walk away. No peeking- you’ll steal the heat from your Grilled Cheeses and this will take longer.
Just waiting on some friends.

  • When your timer goes off, flip your Grilled Cheeses with your sturdy turner. Set the oven for 6 more minutes.
  • Flip your Grilled Cheese one last time and leave it in for one minute. Your oven may or may not have an attitude, and you may or may not need this last minute. I find that I do- but I also like a perfect, even, extra golden crunchtastic exterior on both sides. Because I am, in fact, the Original Crunchasaurus.
Perfection.

Let your Grilled Cheeses cool for just a few before you cut into them- they’ll be extra ooey and gooey and that Cheddar can be like molten lava at first.

*Drool*

I know it’s not what you think you need when you make a Grilled Cheese. I know it sounds crazy- mustard? and mayo? and cheddar? But trust me. You won’t be sad the next time your kids demand Grilled Cheese. And maybe someday, you’ll try it exactly the same way, with Baby Swiss (swoon)! It’s just a cheese sandwich, after all… or is it?

Let me know how you like it in the comments, and don’t forget to subscribe!

These Times In Which We Live

“I’m an Old Soul.”

You’ve heard someone say that. Maybe you’ve said it yourself. But the reality is, you love your technology- your Instawhatever, your book of faces, your refrigerator that can sing to you, your oven with a computer for a face, and the ability to watch your dog on your phone at playschool while you’re supposed to be hammering away on your office computer. And it’s okay.

These times in which we live are strange. We have some really distinct generations trying to make a go of it all here together, with different ideas and different methods due to our different brains. Baby Boomers, Generation X, Generation Y, and the latest and greatest addition to this club… Xennials… are all battling for space, for power, for influence, for visibility.

One thing that most of us seem to crave, though, is a connection to our past. Most people alive today have an intense sense of nostalgia for their particular days-gone-by… and, interestingly, the nostalgia waxes the same, regardless of generation. Your grandma had jars of home-canned yummies that could have lasted through a nuclear winter. Your great aunt knew how to make her own clothes and, at one time in her life, did so out of flour sacks. Your mom knew how to make pie crust and pastry and noodles (oh my!) from scratch, with no recipe, and no fancy kitchen gadgets. Your grandpa used wooden Velveeta boxes to organize his nuts and bolts and screws in his extraordinarily organized garage, where soapbox derby cars, rolling carts, wall shelves, and other moments of ingenuity were born. These people were creative, resourceful, skilled, and knowledgeable. Somehow, we didn’t learn from them. Let’s correct that.

Let’s keep the fancy that we love in our daily lives. Let’s make sure we know that our puppy is getting all the belly rubs he could need— but let’s re-learn how to make dinner from scratch (which means NOT OUT OF A BOX). Let’s grow a garden (I’ll help you- you can do it!), let’s pick our own veggies (or better yet- make your kids- you’ll be teaching them how to survive, after all), let’s put them in jars and seal them and store them on shelves in our basement or garage. Let’s learn basic stitching so that if we ever had to mend or make a piece of clothing, we could. Let’s get back to basic home life skills. We never know when we might have to be self-sufficient again… but even if we don’t, you’ll still be the Renaissance Man or Woman in your circle of friends.

Come be an Old Soul with me. I’ll show you how. Subscribe below to learn about all of this, and more!

Please Allow Me to Introduce Myself…

Bonus points awarded if you sang it.

My name is Amy. All my life, I haven’t quite… fit in. I don’t mind— it makes me a great aunt, a great dog mom, a great employee, and a great friend.

I’m an old-fashioned lady stuck here in this modern world. It sounds like I’m annoyed— but don’t worry. I love penicillin just as much as the next person.

I used to have a 1940’s Bakery. It sounds like I just made that up, but it’s true, I promise. I have a 1940’s soul, and I made it into the most magical living, breathing thing.

We closed, although we were quite popular, largely because this world that I don’t fit into just prefers to get their treats at a mega mart instead of making an extra trip. This is the part where I tell you small businesses need your weekly support… not just when you’re feeling generous.

Since closing, I have nearly daily had people emailing to find out how to do what we did, and to continue to ask for advice. So that’s what we’ll do here. I say “we” because there’s no way I could do it alone— and here’s where you come in! Subscribe to our blog, and make sure to ask for what you would like to know in the comments section!

Design a site like this with WordPress.com
Get started